Posts

Showing posts from September, 2017

Galley Construction - Part II

Image
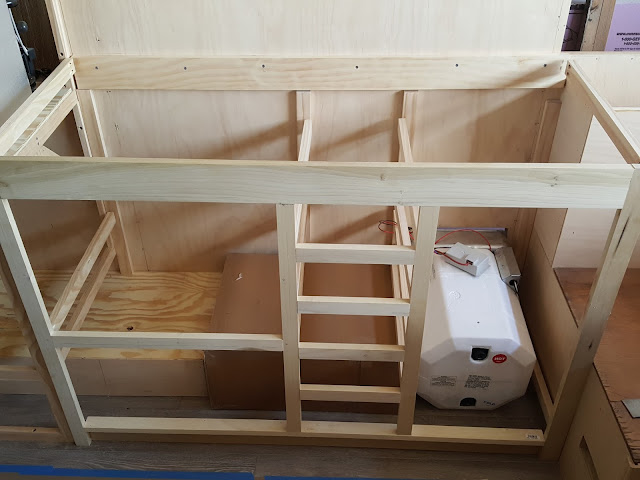
Galley Installation With the dinette benches in place, we proceeded with install/anchoring of the galley cabinets.  Here's a few shots of the install.  Also, we checked and double checked the fit for the 6-gallon hot water heater and the 15-gallon fresh water tank.  Oh...and the water pump that will be located in the cabinet too.  We're cramming as much in here as possible to have room for storage of other items under the dinette benches and in cabinets. The cardboard box is a mock-up of the size of the 15-gallon water tank.  We wanted to be sure that if we had to remove the tank in the future, we could get to it by taking out the microwave, lifting out the shelf for the microwave, and accessing the tank from there.  It looks like the plan will work. Instead of 5 drawers, we'll have 4.  The lower drawer will be false front, since the water tank will be in the way. The wooden box you see on the left side of the picture is a cover for the wheel well.  Underneath,

Dinette Bench Construction - Part II

Image
Dinette Bench Contstruction Now that the flooring was complete, we could install the dinette and galley and get them anchored to the floors and walls properly. Benches First Both benches installed.   Close up of street side bench.  This one is wider than the curb-side bench, so the middle slat needs extra support. Curb-side bench.  The original bench top is sitting on the new bench base.  Perfect fit.  :-) Here's the dinette area benches with the street-side bench back that doubles as storage installed.  I placed the original table top in the area to get an idea of how everything was fitting.

Flooring First!

Image
Plank Flooring For the Camper Realizing that the dinette benches and the galley cabinets would require soffits to be placed on the walls...and further realizing that the thickness of the floor covering would dictate where these soffits needed to be placed...we set about selecting flooring. This took a while . We ended up with a glue down plank flooring that simulated wood.  When we finally agreed on a product, ordered it, and had it in hand we then had to figure out a pattern that we liked.  We tired a few of the suggested patterns; but finally decided that what we liked best was a totally random pattern.  We also had to take into account the horizontal placement of the planks: you don't want to have to lay a super thin slice along one wall or another.  Here's a couple of photos where we were laying out options: Checking horizontal alignment. If this was brick work; I think this layout is called "running bond". Final Flooring Insta